Set a Quick Menu in Geta.ai
A Quick Menu in Geta.ai enhances user navigation by providing easily accessible options within your bot. This guide will walk you through the steps to set up a Quick Menu, helping you improve user interaction and engagement.
Steps to Set a Quick Menu-
-
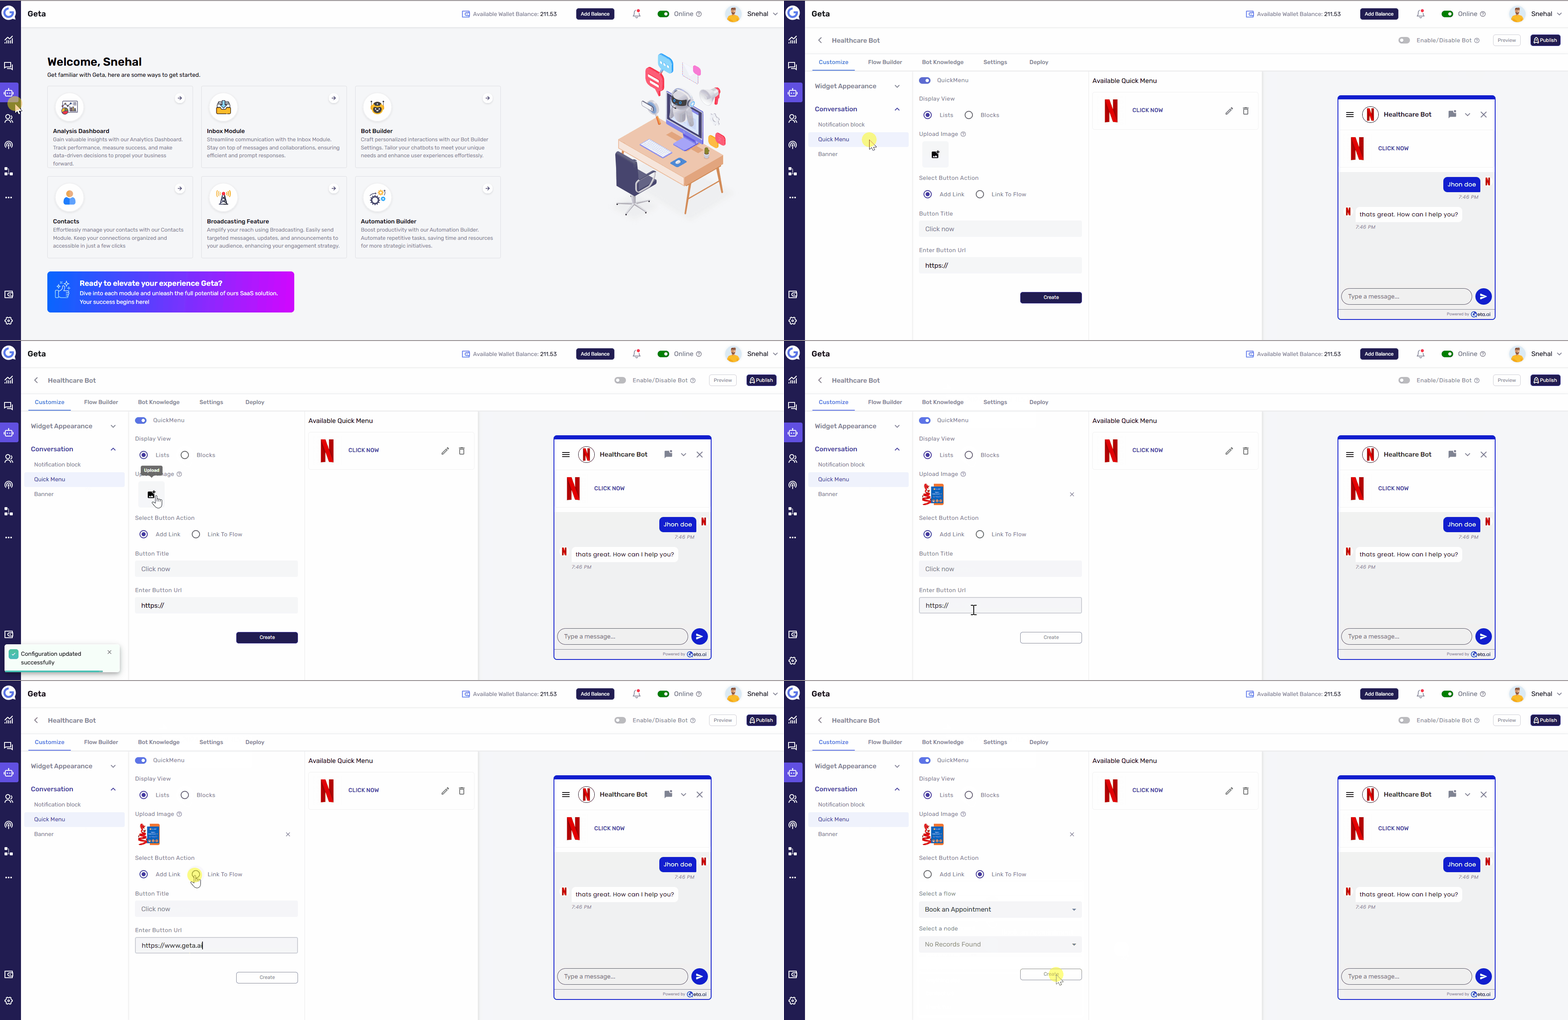
Navigate to the Bot Builder
-
Log in to your Geta.ai dashboard.
-
Go to the Bot Builder module and select the bot you want to customize.
-
Click on the Manage button to access the customization options.
-
-
Access the Quick Menu Settings
-
In the Customize section, go to the Conversation tab.
-
Select the Add Quick Menu option to begin setting up the menu.
-
-
Configure Quick Menu Options
-
Choose a Display View:
-
Select how the Quick Menu will appear to users:
-
Lists: Displays options in a vertical list format.
-
Blocks: Displays options as horizontal blocks.
-
-
-
Configure Button Actions:
-
Add a Link: Enter the URL you want the button to navigate to.
-
Link to a Bot Flow: Connect the button to a specific bot flow to guide users through a predefined interaction.
-
-
Set Button Title and URL:
-
Provide a clear and concise title for the button that describes its action (e.g., "Learn More" or "Contact Us").
-
Enter the corresponding URL or flow link.
-
-
-
Save the Quick Menu
-
Once all options are configured, click Save to apply the Quick Menu settings.
-
Tips for Effective Quick Menus
-
Use descriptive button titles to make navigation intuitive for users.
-
Keep the Quick Menu options concise to avoid overwhelming users.
-
Regularly review and update the menu to align with your bot’s goals and user needs.
Next Steps
-
Test the Quick Menu: Interact with your bot to ensure the Quick Menu appears as expected and all buttons function correctly.
-
Monitor User Engagement: Use analytics to track how often users engage with the Quick Menu options and optimize as needed.
This guide ensures a seamless process for setting up a Quick Menu in Geta.ai, empowering users to interact with your bot more effectively.

