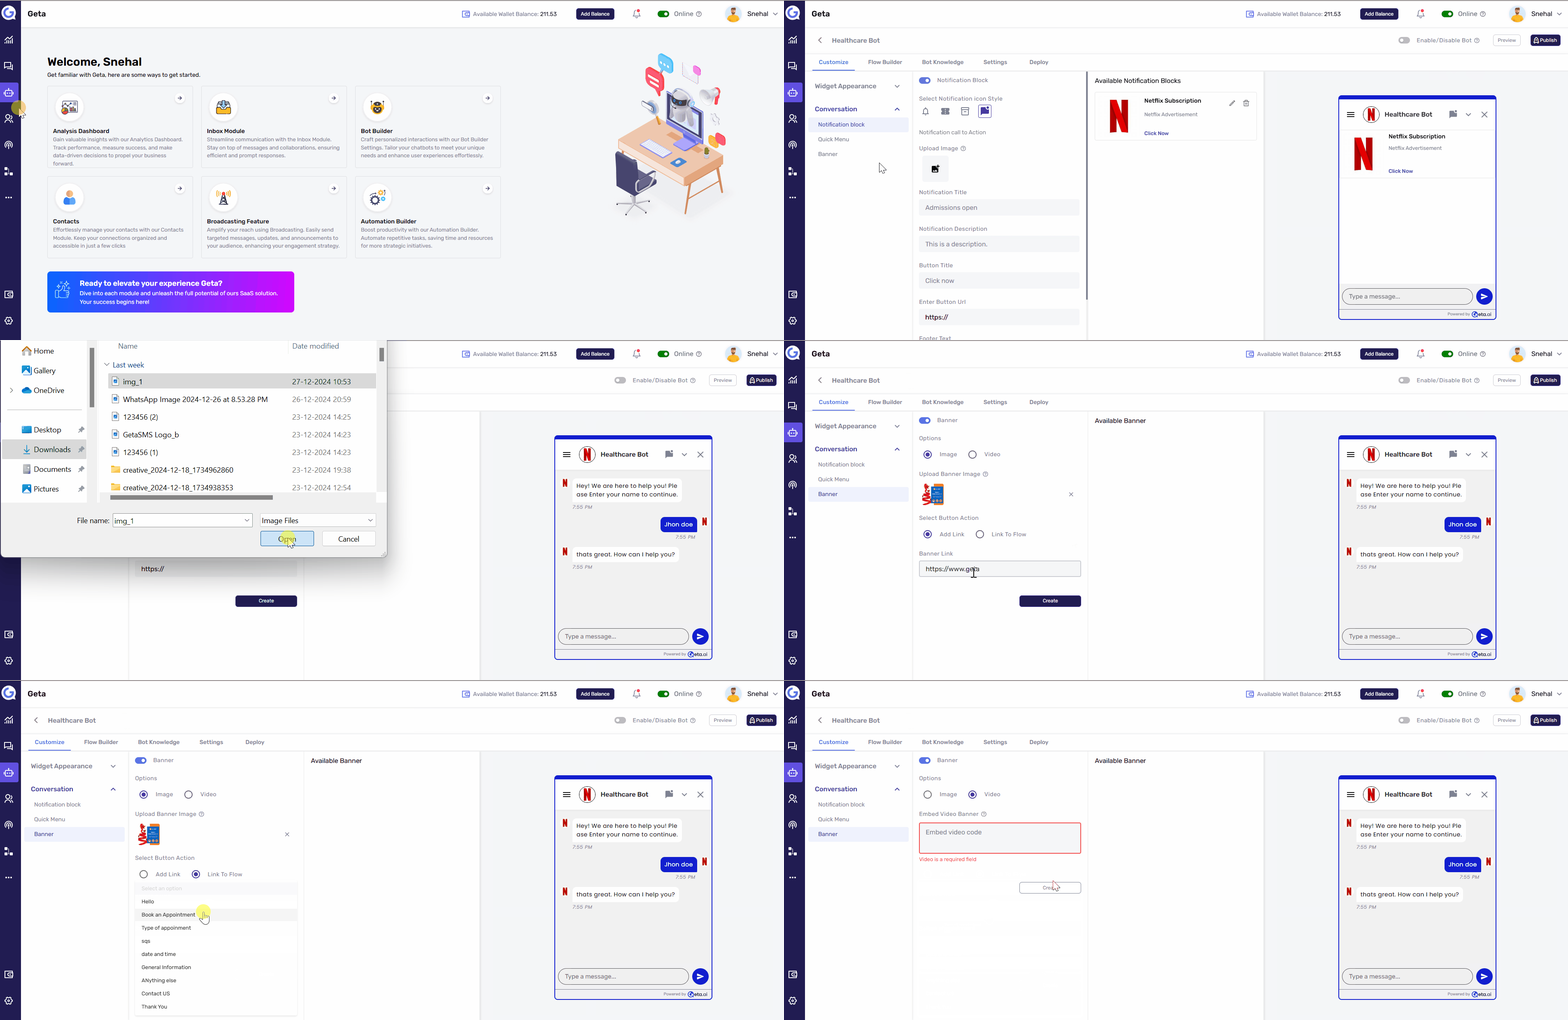
Set a Banner in Geta.ai
A banner in Geta.ai is a powerful tool to highlight important messages, promotions, or actions within your bot. This guide explains how to set up a banner to enhance user engagement.
Steps to Set a Banner-
-
Navigate to the Bot Builder
-
Log in to your Geta.ai dashboard.
-
Go to the Bot Builder module and select the bot you want to customize.
-
Click on the Manage button to access customization options.
-
-
Access the Banner Settings
-
In the Customize section, go to the Conversation tab.
-
Select the Banner option to begin setting up the banner.
-
-
Upload a Banner
-
Choose a banner format:
-
Image: Upload an attention-grabbing image to display as the banner.
-
Video: Upload a short, engaging video for dynamic interaction.
-
-
Ensure the file format and size adhere to the platform’s guidelines for optimal display.
-
-
Set Button Actions
-
Add a Link: Input a URL that users will be directed to when they click the banner.
-
Connect to a Bot Flow: Link the banner to a specific bot flow to guide users through an interaction.
-
-
Add a Banner Link
-
Include a secondary banner link for additional interaction opportunities if required.
-
-
Save the Banner
-
Once the banner and its actions are configured, click Save to apply the changes.
-
Tips for Effective Banners-
-
Use high-quality images or videos that resonate with your audience.
-
Ensure button actions are relevant and guide users toward meaningful interactions.
-
Keep the banner visually appealing but not overwhelming to avoid distracting users.
Next Steps-
-
Test the Banner: Interact with your bot to verify that the banner displays correctly and all actions are functional.
-
Monitor Engagement: Use analytics to measure user interactions with the banner and optimize based on performance data.
This guide ensures a smooth process for setting up banners in Geta.ai, helping you leverage visuals to drive user engagement effectively.

