Configure a Welcome Message in Geta.ai
A Welcome Message is the first interaction users have with your bot, setting the tone for engagement. This guide explains how to configure a Welcome Message using the Flow Builder in Geta.ai.
Steps to Configure a Welcome Message-
-
Navigate to the Bot Builder
-
Log in to your Geta.ai dashboard.
-
Go to the Bot Builder module and select the web bot you want to customize.
-
Open the Flow Builder to access the bot's interaction flow.
-
-
Access the Initial Flow
-
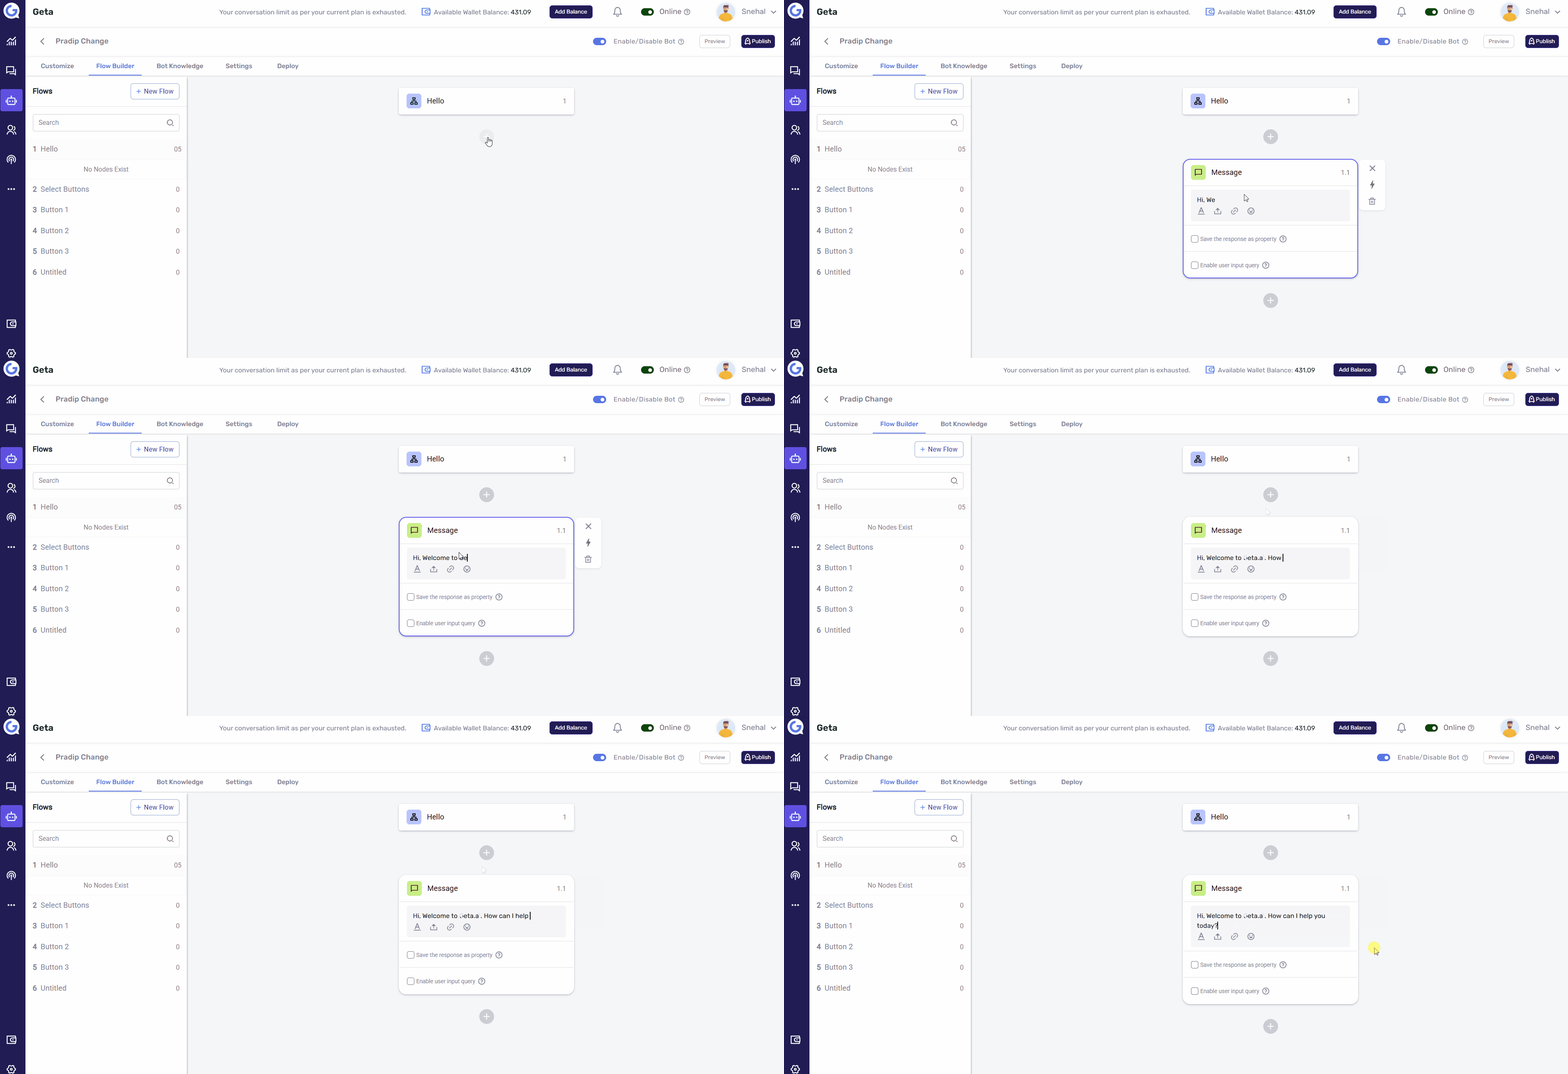
Locate the Initial First Flow in your Flow Builder. This is where the bot begins interacting with users.
-
-
Add a Message Node
-
Click on the + button within the Initial First Flow.
-
From the menu of node types, select Message Node.
-
-
Enter the Welcome Message
-
In the Message Node, type the welcome message you want users to see.
-
Example: "Hello! Welcome to [Your Company Name]. How can I assist you today?"
-
-
Ensure the message is friendly and clearly outlines the bot’s purpose.
-
-
Save the Changes
-
Click Save to apply the Welcome Message to the bot's flow.
-
Tips for an Effective Welcome Message-
-
Keep the message concise and engaging.
-
Use a tone that matches your brand personality.
-
Include a prompt or question to guide users to the next step (e.g., "Select an option below to get started.").
Next Steps-
-
Test the Welcome Message: Run the bot to ensure the Welcome Message appears as expected.
-
Enhance with Quick Replies: Add quick reply buttons or menu options to guide users seamlessly.
-
Monitor Engagement: Use analytics to evaluate how users respond to the Welcome Message and make adjustments if necessary.
This guide ensures you can configure an engaging Welcome Message in Geta.ai, helping your bot make a great first impression.

