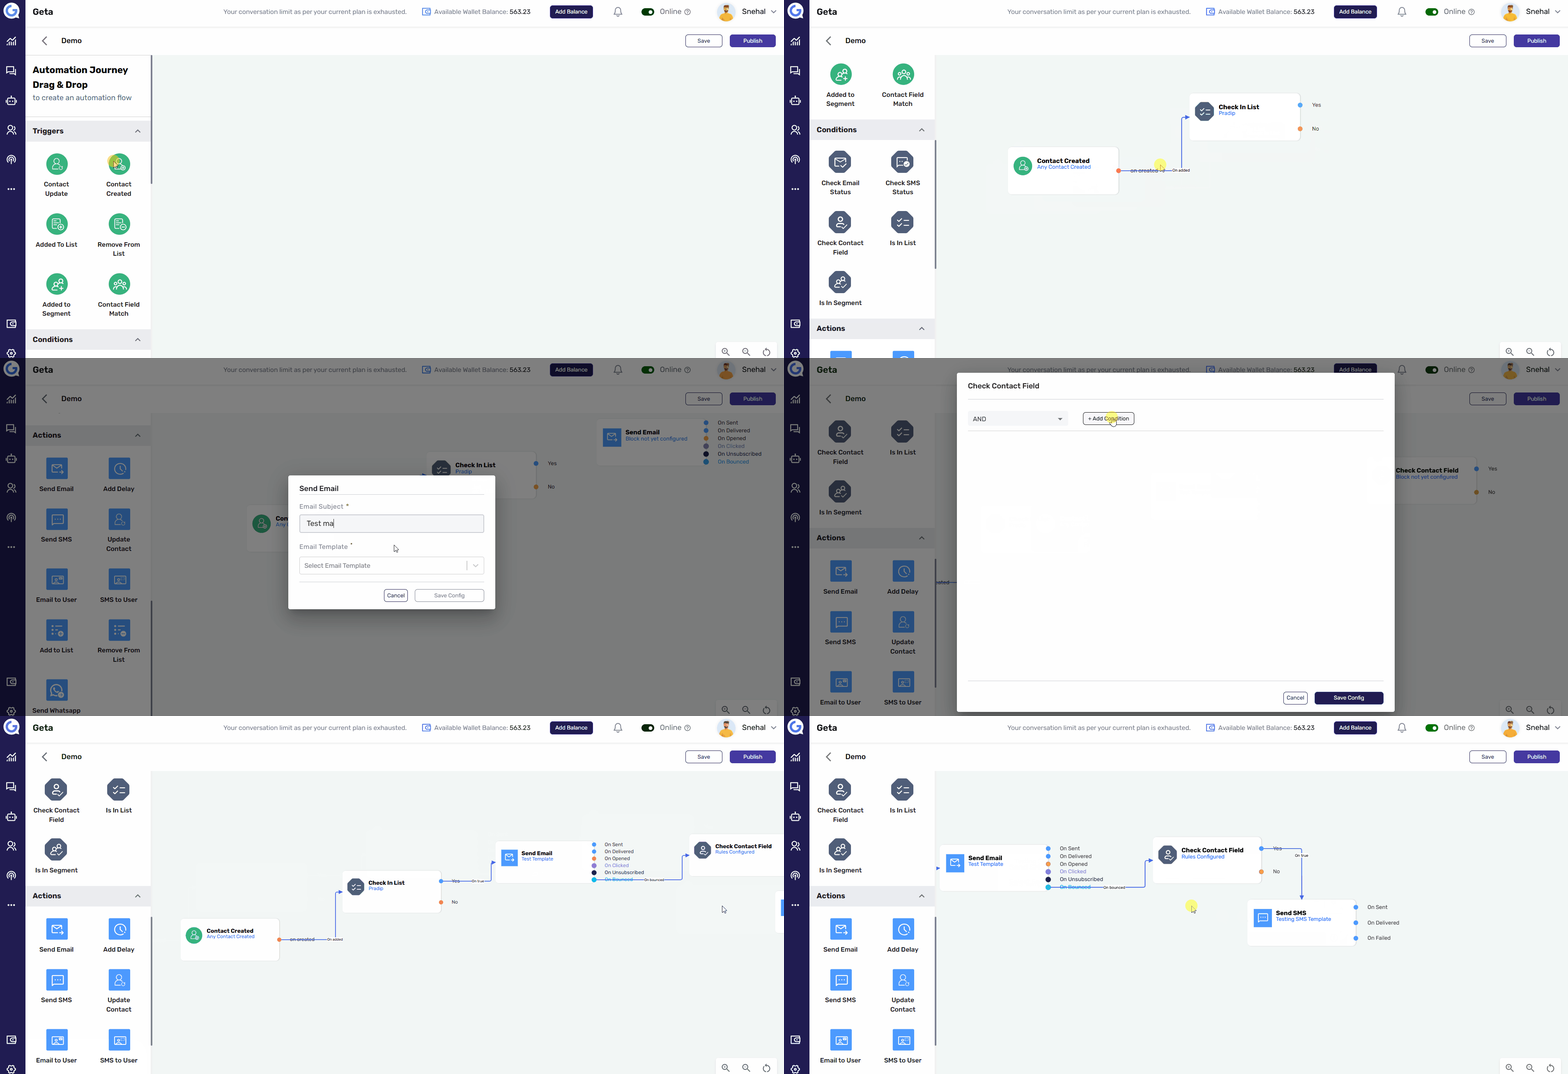
Set Multiple Conditions for a Single Automation Journey Flow
Yes, multiple conditions can be added to create complex automation flows tailored to specific user behaviors and actions. This flexibility helps you customize the journey for different scenarios.
Steps to Set Multiple Conditions for a Single Automation Flow:
-
Navigate to the Automation Module:
- Open the Automation Module from the left-hand menu.
-
Select or Create an Automation Flow:
- Either select an existing automation flow or create a new one.
-
Add a Condition Node:
- In the flow editor, add a condition node to start defining the rules for your flow.
-
Define Your First Condition:
- Specify the first condition, such as user behavior, properties, or engagement actions.
-
Add Yes/No Paths:
- Create Yes/No paths for the condition, allowing you to set different actions based on whether the condition is met.
-
Add Additional Conditions:
- To add more conditions, insert more condition nodes after the Yes/No paths and define new criteria.
-
Connect All Conditions, Triggers, and Actions:
- Ensure all conditions are linked to appropriate triggers and actions for a seamless workflow.
-
Save and Publish:
- After configuring all the conditions, click Save and then Publish to activate your multi-condition automation flow.
Once you've set up the conditions and connected everything, saving and publishing ensures your automation flow runs smoothly and efficiently, adapting to various triggers.

