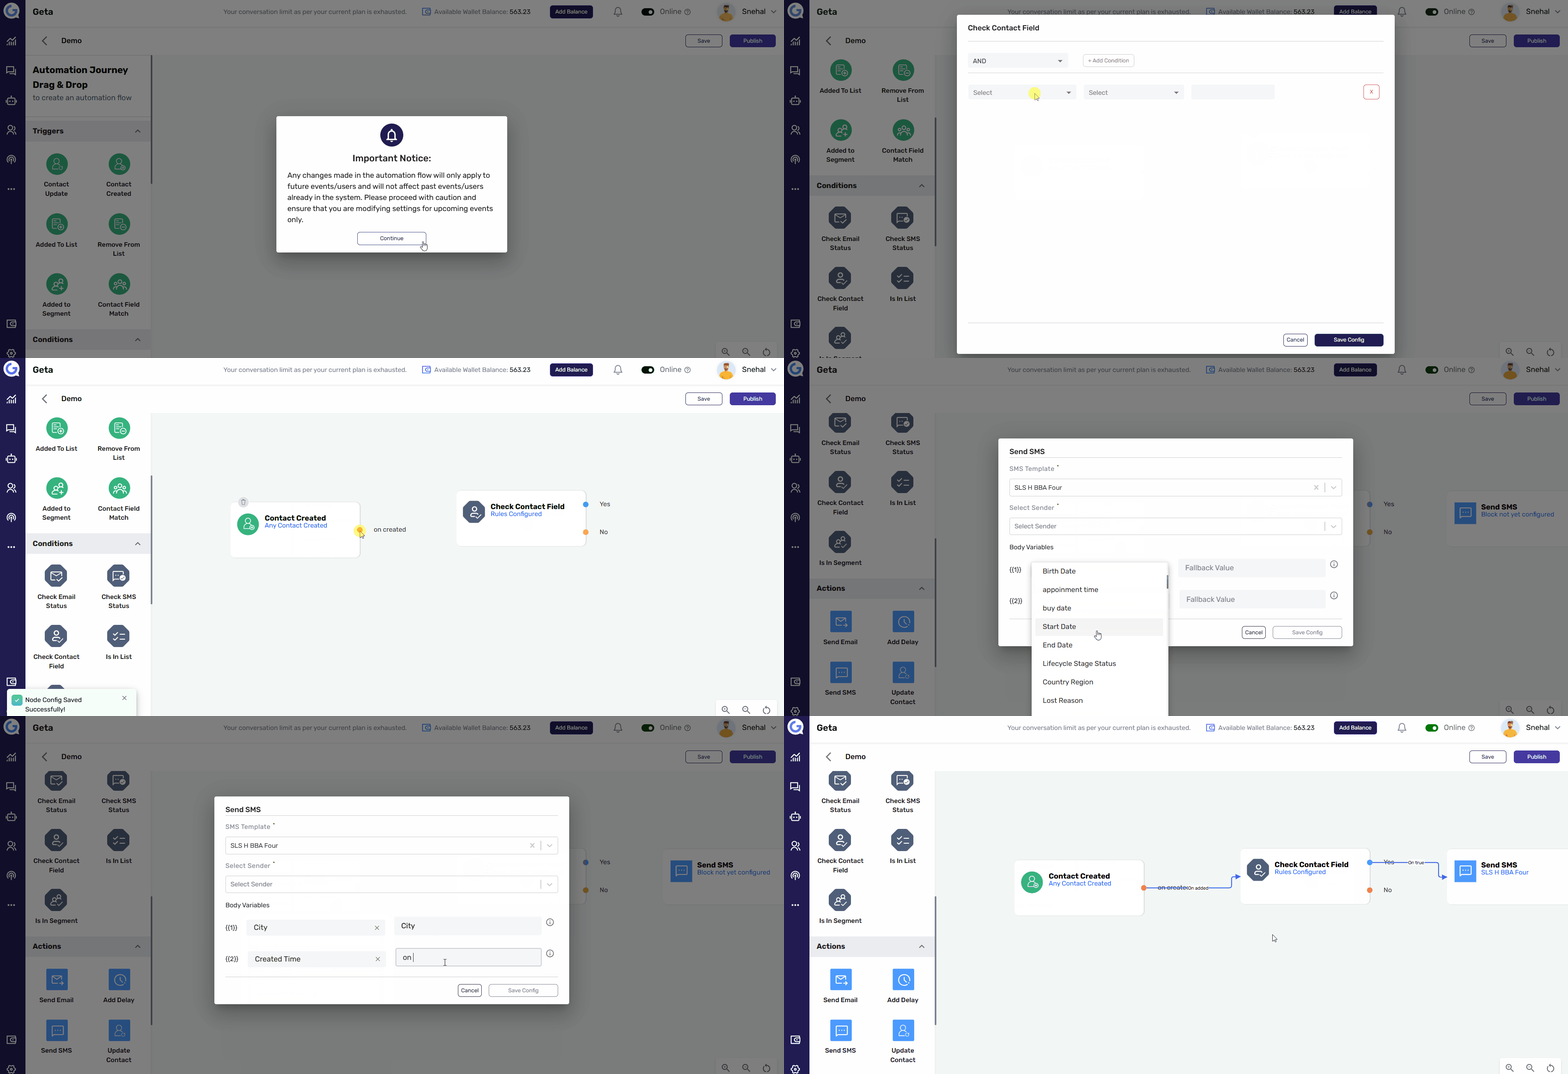
Configure Actions in an Existing Automation Journey
Configuring actions in an existing automation journey helps you fine-tune the workflow and adapt to changing needs. Here's how you can do it:
Steps to Configure Actions in an Existing Automation Journey-
-
Navigate to the Automation Module:
- Open the Automation Module from the left-side menu.
-
Select an Existing Automation Journey:
- Choose the automation journey you want to update from the list.
-
Locate and Edit Action Nodes:
- Find the action(s) within the flow that you want to customize, such as sending messages, updating contact, or editing delay.
- Click on the specific action node to edit its settings.
-
Configure the Action:
- For example:
- If sending a message, you can change the template.
- Modify conditions for triggering the action.
- Adjust the delay time between actions.
- For example:
- Connect Actions:
- Ensure the actions are connected to the appropriate conditions or triggers to complete the flow.
-
Save and Publish Changes:
- After making adjustments, click Save to record your changes.
- To apply the changes, click Publish to activate the updated automation journey.
This will update and connect your automation flow steps, making it operational.

